Judul : How to Build Floating Shelves for Every Room in Your Home
link : How to Build Floating Shelves for Every Room in Your Home
How to Build Floating Shelves for Every Room in Your Home
How to Build Floating Shelves for Every Room in Your Home
Hey there, DIY enthusiasts! Are you tired of bulky bookshelves taking up valuable floor space? Do you dream of a minimalist look with a touch of personality? Well, you're in luck! Floating shelves are the perfect solution for adding storage and style to any room in your home.
Forget about complicated carpentry skills. Building floating shelves is surprisingly easy, and we're here to guide you through every step. So, grab your tools, put on your favorite playlist, and let's get started!
Choosing the Right Materials and Tools
Before you dive into the building process, you need to gather the right materials and tools. Don't worry, you won't need a whole workshop's worth of equipment. Here's what you'll need:
Materials:
- Wood: Choose a wood type that suits your style and the room's design. Pine, plywood, or MDF are popular choices.
- Brackets: These are the unsung heroes of floating shelves. You'll need strong brackets to securely support your shelves. There are different types available, so consider your shelf's weight and length.
- Screws: Use screws that are long enough to securely attach the brackets to the wall. Make sure they are also compatible with the type of wall you have (drywall, plaster, etc.).
- Wood filler: To hide screw holes and create a seamless look.
- Sandpaper: For smoothing out any rough edges and preparing the wood for paint or stain.
- Paint or stain (optional): To personalize your shelves with your favorite colors or finishes.
Tools:
- Measuring tape: Essential for accurate measurements!
- Pencil: For marking the shelf's location and any measurements on the wood.
- Level: To make sure your shelves are straight and level.
- Saw: Choose a saw appropriate for cutting your wood. A circular saw or jigsaw are good options.
- Drill: For drilling pilot holes and attaching the brackets.
- Screwdriver: For tightening screws.
- Safety glasses and ear protection: Always prioritize safety when working with tools.
Planning Your Floating Shelf Design
Now that you have your tools and materials, it's time to get creative! Planning your floating shelf design is a fun part of the process. Consider these points:
- Location: Think about where you want your shelves to go and what purpose they will serve. Will they be in the living room for displaying books and decor? In the bedroom for storing clothes and accessories?
- Size: Determine the length, width, and depth of your shelves. Consider what you plan to store or display on them. Don't go too small or too large for the space!
- Number of Shelves: How many shelves do you need for your desired storage or display?
- Style: Do you prefer a rustic look with raw wood, a modern minimalist style, or a more eclectic design? Your chosen wood type and finish will influence the final style.
Building the Floating Shelves
Ready to start building? Here's a step-by-step guide:
Step 1: Cut the Wood
Start by cutting the wood to your desired dimensions using your saw. Make sure you cut the wood accurately and precisely to ensure that your shelves are level and symmetrical.
Step 2: Sand the Edges
Safety first! Wear your safety glasses and sand the edges of the wood to smooth out any rough spots. This step also helps to prepare the wood for painting or staining.
Step 3: Apply Paint or Stain (Optional)
If you plan to paint or stain your shelves, do so now. Let the paint or stain dry completely before moving on to the next step.
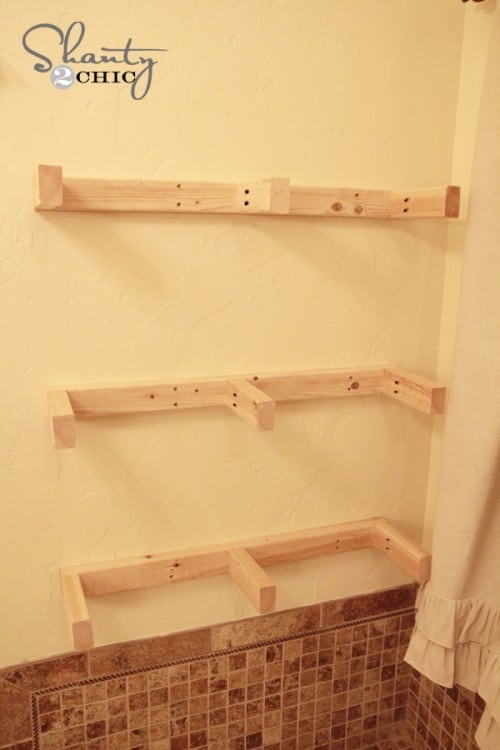
Step 4: Mark the Wall and Install the Brackets
Use a level to mark the desired height of your shelves on the wall. Make sure the markings are level and symmetrical. Then, use your pencil to mark the location of the brackets on the wall.
Use a stud finder to locate wall studs to ensure the brackets are securely anchored. Drill pilot holes at the marked locations and install the brackets using the appropriate screws.
Step 5: Attach the Shelves to the Brackets
Now it's time to attach the shelves to the brackets. Make sure the shelves are level and centered over the brackets. Securely attach the shelves using screws that are compatible with the wood and bracket material.
Step 6: Fill Screw Holes and Touch Up
After your shelves are secured, fill the screw holes with wood filler. Let the wood filler dry completely and then sand it smooth with sandpaper to create a seamless look. If needed, touch up any paint or stain that was disturbed during the installation process.
Styling Your Floating Shelves
Congrats! You've successfully built your floating shelves. Now it's time for the fun part â€" styling them! Here are a few tips to get you started:
- Create a Theme: Choose a theme for your shelves based on the room's style. Do you want a modern minimalist look with sleek sculptures and plants? A cozy library feel with books and candles? Or a whimsical gallery wall with framed art and personal photos?
- Play with Heights: Mix and match objects of different sizes to create visual interest. Place taller items towards the back and shorter ones towards the front.
- Balance Symmetry and Asymmetry: Don't be afraid to break the rules a bit! Symmetry can create a sense of order, while asymmetry can add visual interest.
- Incorporate Texture: Use objects with different textures, like wood, metal, glass, and fabric to create a multi-dimensional display.
- Don't Overdo It: Avoid overcrowding your shelves. Give each item space to breathe and highlight its unique qualities.
Floating Shelf Ideas for Every Room
Here are some ideas for how you can use floating shelves in different rooms of your home:
Living Room:
- Display your favorite books and decor.
- Create a gallery wall with framed photos and artwork.
- Use them as a place to showcase houseplants.
Bedroom:
- Store jewelry and accessories on a shelf near the bed.
- Create a reading nook with a floating shelf for books and a lamp.
- Add a floating shelf above your dresser for extra storage.
Kitchen:
- Use floating shelves to store spices, cookbooks, and other kitchen essentials.
- Display your favorite dishes and decorative mugs.
- Create a stylish pantry with floating shelves in a corner or alcove.
Bathroom:
- Store towels and toiletries on floating shelves.
- Display decorative candles and plants to add a spa-like ambiance.
- Add a floating shelf above the toilet for extra storage.
Office/Home Office:
- Use floating shelves as a desk organizer for pens, pencils, and office supplies.
- Create a mini library for your favorite reference books.
- Add a floating shelf above your desk for inspiration boards and motivational quotes.
Conclusion
There you have it! Building floating shelves is a fun and rewarding DIY project that can instantly upgrade the look and functionality of any room in your home. Don't be afraid to experiment with different designs and styles to create shelves that reflect your personal taste and personality. So, what are you waiting for? Grab your tools and get building!
thank for reading article How to Build Floating Shelves for Every Room in Your Home
now you reading How to Build Floating Shelves for Every Room in Your Home with the link https://woodsetfoldable.blogspot.com/2024/11/how-to-build-floating-shelves-for-every.html
0 Response to "How to Build Floating Shelves for Every Room in Your Home"
Post a Comment
Note: Only a member of this blog may post a comment.